Basement Playhouse Build – Framing

The Basement Playhouse Build includes tool reviews that are sponsored by The Home Depot. I have been compensated for my time and provided with product. All ideas and opinions are my own. This post contains some affiliate links for your convenience. Click here to read my full disclosure policy. 

I have always loved those darling basement playhouses and under the stair play areas that you see in home shows and on Pinterest. My basement is unfinished and really is an open slate to do whatever I want to with it.  I decided that instead of thinking about this project for a few years, like I usually do, I need to get it done while my girls are young and will still enjoy it.

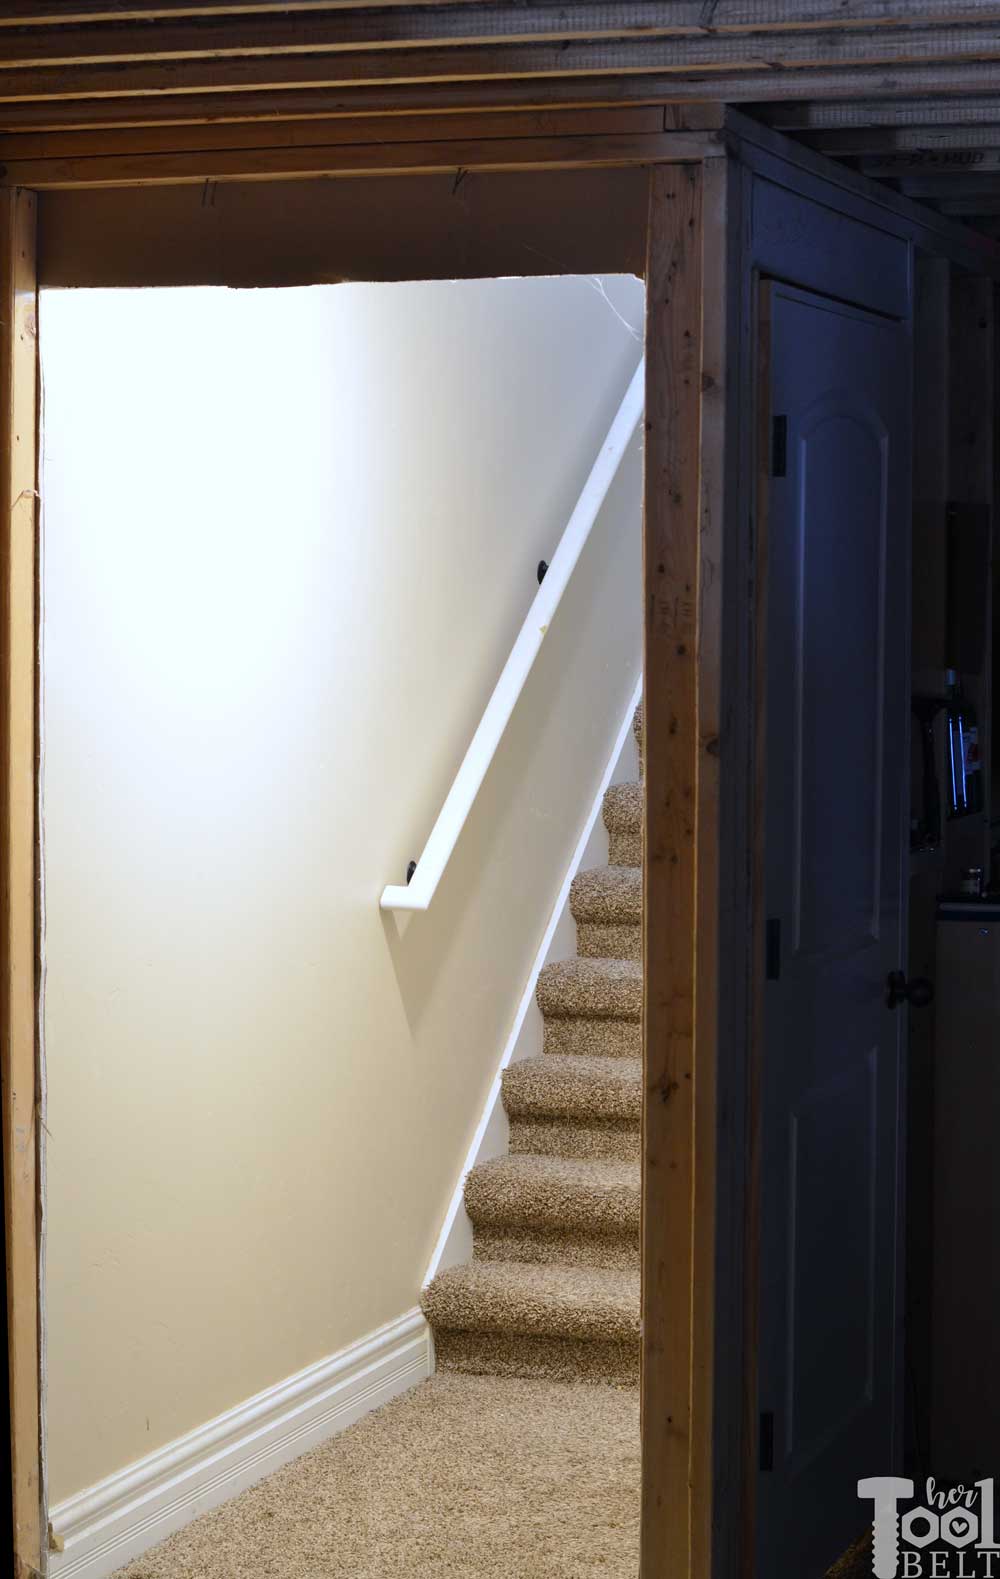
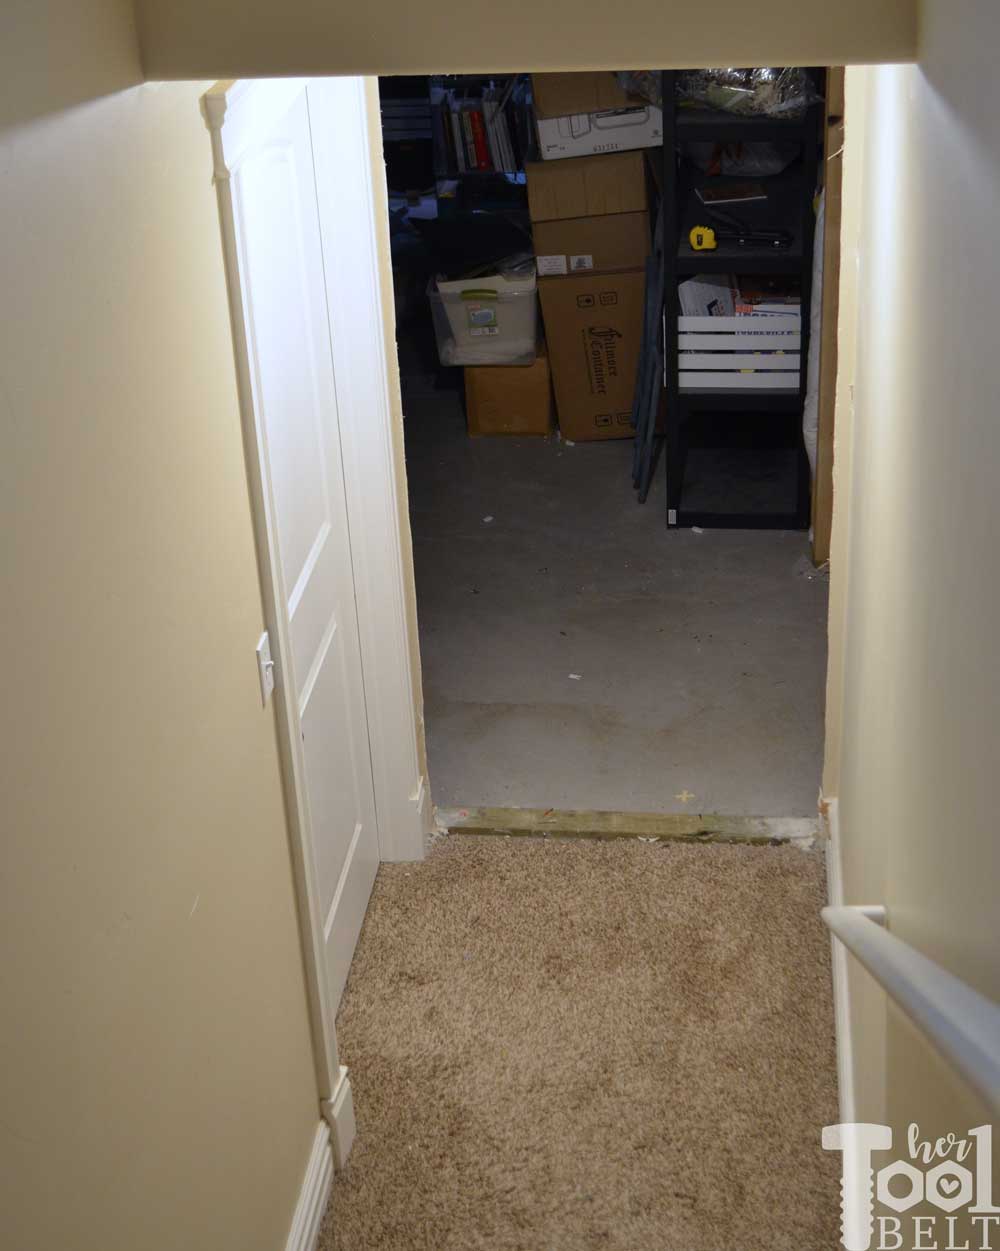
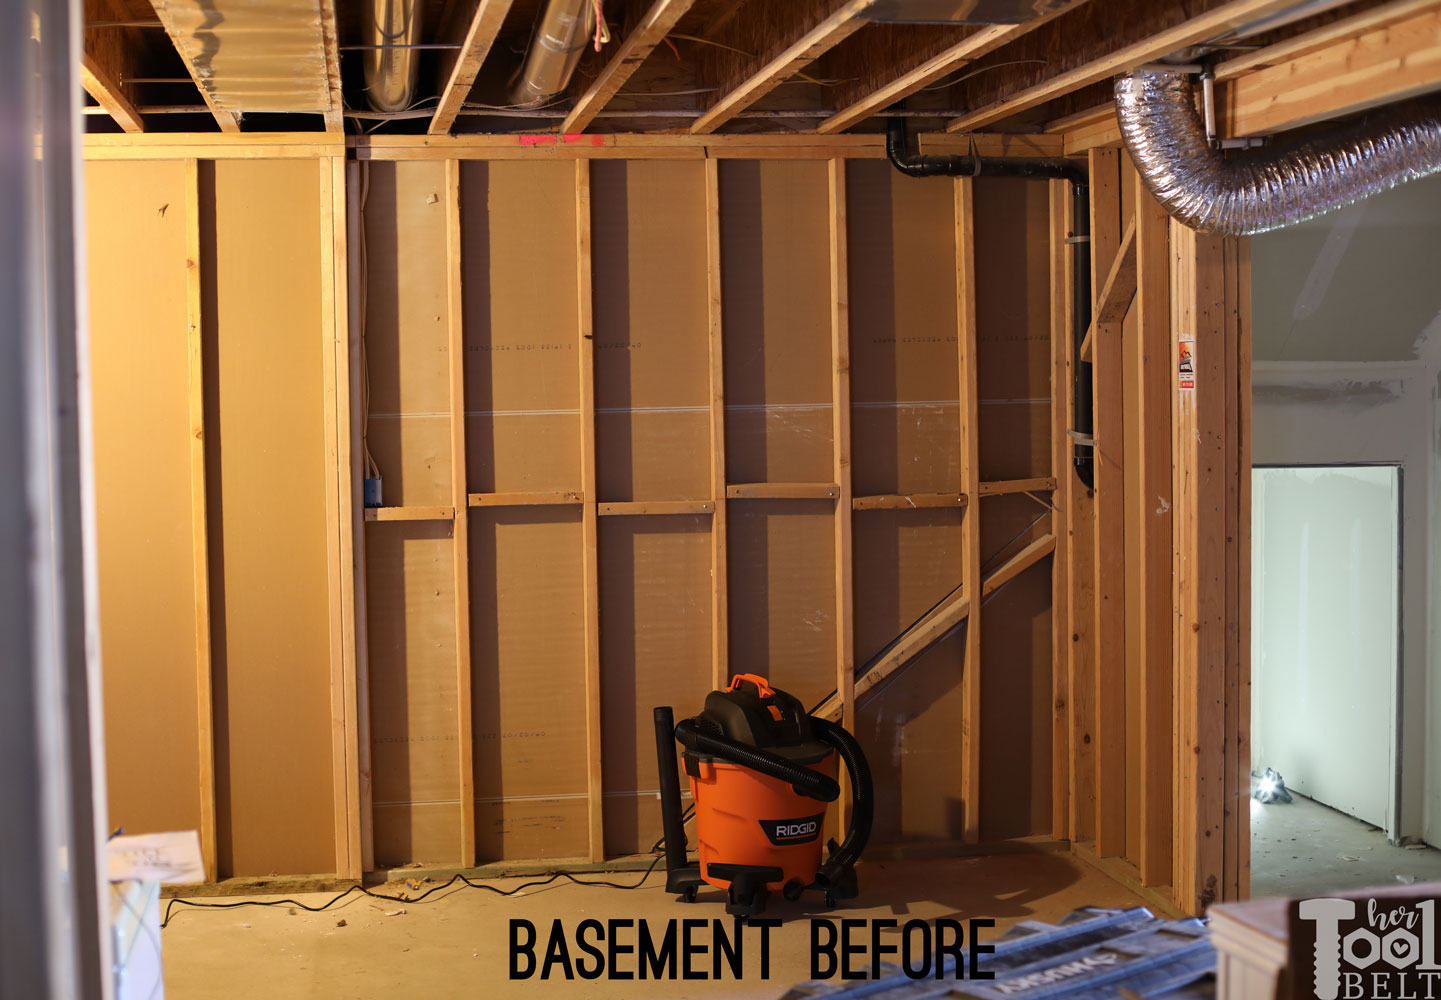
Here’s the space that I’ll be building the playhouse. The back of the playhouse will share the wall of the stairs leading to the basement.

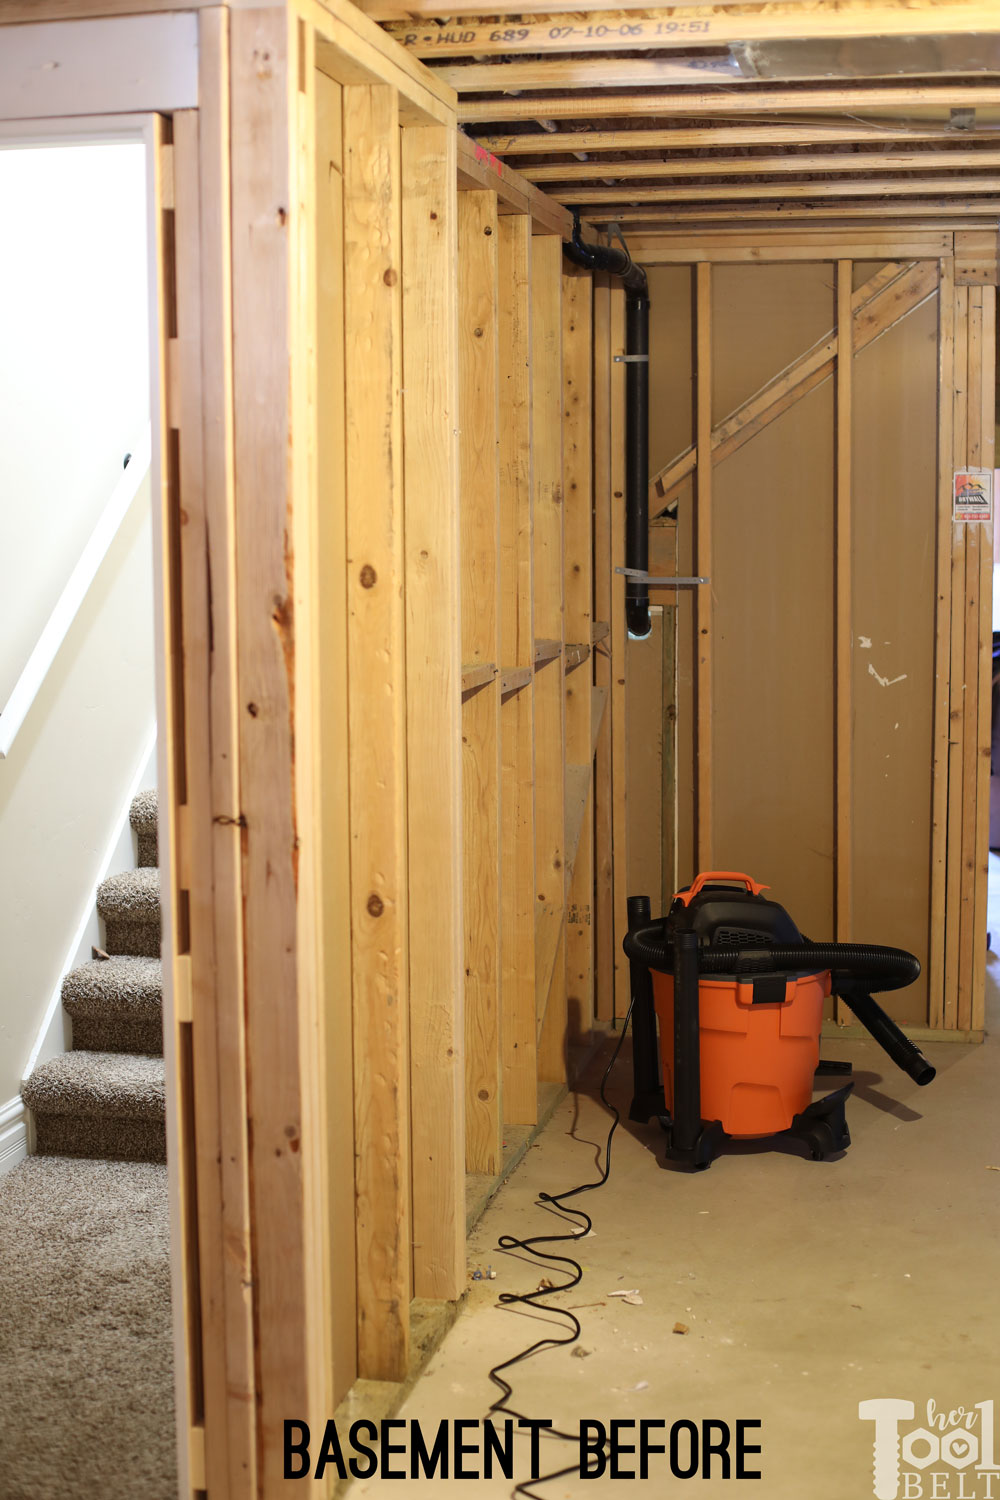
On the far right side, is a little under the stairs cove.  On the left side of the wall is a little pop out from when I had to move the door location.

This is what I came up with for the space. The playhouse will come out from the wall about 6′, and the main portion of the playhouse will be about 12′ long.

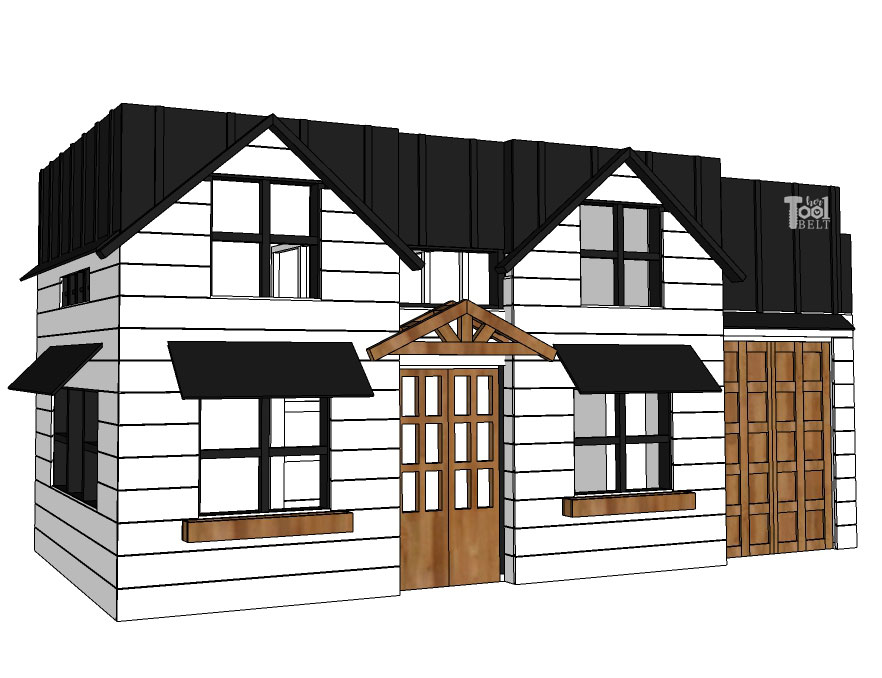
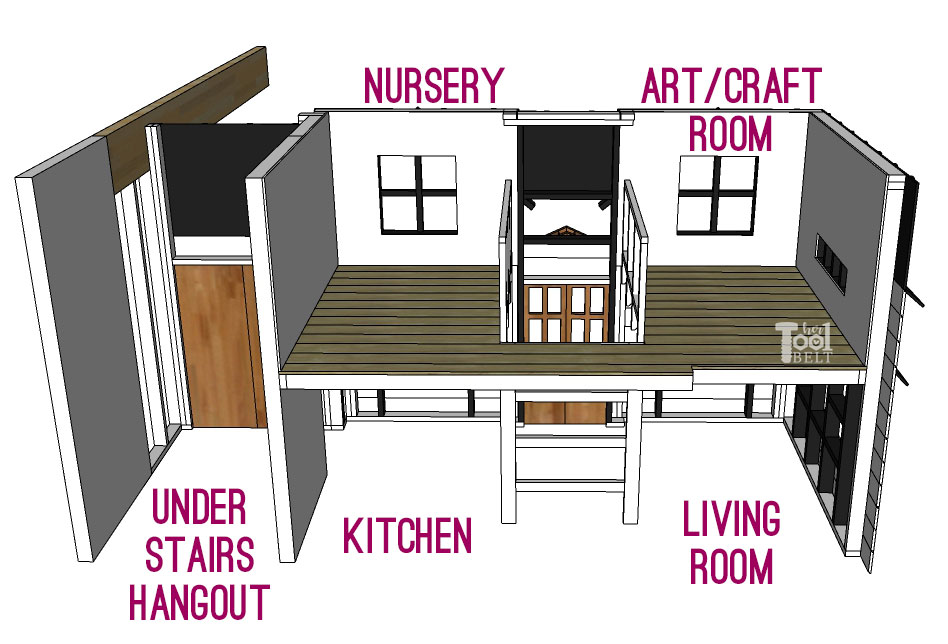
The playhouse will run along the wall of the stairs, and the ‘garage’ will go under the stairs. The main house will have 2 levels. On the main level will be the Kitchen and Living Room for ‘tea parties’ and such. Upstairs will have the Arts & Crafts Room and a Nursery for all of their stuffed animals that they love. Unfortunately my basement ceilings are only 7 1/2′ high, so it is a little squishy for my older daughter. But when both girls get too tall, I can remove the second floor if they want me too. I’m thinking that the under the stairs portion will just be a hangout place with big soft pillows and cushions.

I had to build around a number of odd things (multiple beams, walls, HVAC, plumbing) in my basement, which I’m sure every situation will be different. I’ll share the plans as if the playhouse is built along a flat back wall, then they’ll have to be adjusted as necessary.

You can check out the tutorials for the whole playhouse build:

With this build, I’m also reviewing a few tools as part of the #THDprospective program with Home Depot. I’ll be sharing my thoughts on these tools noted with *.

Continue reading

Ashley Nightstand – Free Plans

The Ashley Nightstand with tool review is sponsored by The Home Depot. I have been compensated for my time and provided with product. All ideas and opinions are my own. This post contains some affiliate links for your convenience. Click here to read my full disclosure policy. 

For my family Christmas party, all of the cousins (my kids, nieces and nephews) draw names for whom they give a gift to that year. My daughter, drew her tween cousin Ashley. Ashley really needed a simple nightstand to put her alarm clock on and store a book or two. One issue is that the nightstand needs to go over the only air vent in the room, so we wanted to do our best not to block the air flow. The best part of the Ashley nightstand is that I raided the scrap wood bin and the whole nightstand is scrap wood, yay for me! I had a few ends of 1×12’s that I used for the top and shelf, but I wrote up the plans using purchased 1×6’s and 2×2’s. The lumber for this cute nightstand is only about $15 (although wood prices around the country vary.)

The Ashley nightstand is a simple nightstand with an enclosed shelf. Build this nightstand for about $15 in lumber...or it's perfect to use up scrap wood. Free plans on hertoolbelt.com


The Ashley nightstand is a simple nightstand with an enclosed shelf. Build this nightstand for about $15 in lumber...or it's perfect to use up scrap wood. Free plans on hertoolbelt.comFront view              //                Isometric view               //              Side view

How to Build the Ashley Nightstand

Continue reading

Front Door Refresh and Smart Lock Install

Front door refresh and smart lock install is sponsored by Delaney Hardware. I have been compensated for my time and provided with product. All ideas and opinions are my own. This post contains some affiliate links for your convenience. Click here to read my full disclosure policy. 

‘Tis the season for Holiday parties and family gatherings. It’s nice to have a welcoming front door to make a great first impression of your home. Sadly my worn door was looking pretty shabby. When we bought this house, it was unfinished and had been sitting empty for quite a while. The front door was bare wood and had some water damage. The painters who applied finish to the door used an all-in-one product with stain and top coat. The door looked good for a while but after a few years the thin top coat started peeling and cracking.

I have a couple of goals with this front door update:

  • Refresh the stain and finish on the door
  • Update my door hardware for an easy keyless entry and smartlock

Having a keyless entry is really appealing for me. I want it to be easy for the kids to let themselves in, if the door is locked.

The Worn Door

From a distance my door doesn’t look too bad, then you walk up to it…

My door handle has lost it’s shine, and has taken a beating from the sun.

You can see all of the cracks and the chipping of the stain and top coat.

The inside door handle finish has also worn off from child safety knob covers. Whoops!

Refreshing The Door

I removed my old door hardware and sanded down the chipping and cracked top coat.

The stain was touched up with Varathane Classic Dark Walnut. To enrich the color of the door, I used SW Van Dyke Brown glaze. The door is protected with an exterior polyurethane in satin.

Choosing Door Hardware

As mentioned earlier, I really wanted to switch my door to a keyless entry. It’ll make it easier for the kids to get in without giving them a key to lose. Also if family needs to stop by and ‘grab’ something, I can give them a code to get in.  Since the slick looking digital locks have come out, I don’t feel like having a keyless entry detracts much from the style of the door especially when the finish is black or tuscany bronze.  To coordinate with the slick look of the Smartlock digital lock, I chose the Avino style door handle in tuscany bronze. I love the straight lines of the Avino.

Plus if you add a Delaney Gateway Hub, you can use the Delaney smarthome app to control your lock and camera (with the hub)!

Getting ready for holiday visitors by refreshing the front door and installing a cool touch pad keyless entry lock. See 12 gorgeous door updates with the 12 doors of December @DelaneyHardware #DelaneyHardware #12DoorsofDecember

Installing the new handleset and lock was really simple. I was able to use the existing holes in the door and swap the old for the new hardware.

Installing the Delaney Digital Lock and Hub Video

Please Subscribe!

Getting ready for holiday visitors by refreshing the front door and installing a cool touch pad keyless entry lock. See 12 gorgeous door updates with the 12 doors of December @DelaneyHardware #DelaneyHardware #12DoorsofDecember

I love how easy the digital lock is to use, even my kindergartner can use it! Yay!

Getting ready for holiday visitors by refreshing the front door and installing a cool touch pad keyless entry lock. See 12 gorgeous door updates with the 12 doors of December @DelaneyHardware #DelaneyHardware #12DoorsofDecember

Yay for no scratches on the inside knob too!

Getting ready for holiday visitors by refreshing the front door and installing a cool touch pad keyless entry lock. See 12 gorgeous door updates with the 12 doors of December @DelaneyHardware #DelaneyHardware #12DoorsofDecember

A couple of cool features about the Smartlock.

  • To prevent the touchscreen from only having finger smudges in certain places, the lock gives you random numbers to press before you enter your code.

Getting ready for holiday visitors by refreshing the front door and installing a cool touch pad keyless entry lock. See 12 gorgeous door updates with the 12 doors of December @DelaneyHardware #DelaneyHardware #12DoorsofDecember

  • The keypad accommodates thirty user codes of four to eight digits with code-probing prevention and disablement after five attempts. You can also program single use codes.
  • Vacation mode with time-configurable deactivation during which all user codes are disabled, you can only use the mechanical key.
  • Compatible with Delaney Smart Home App and Z-Wave components.
  • If your Delaney digital lock is paired with the Z-wave hub, then you can control your lock from your phone!!! We love this feature.

Delaney Hardware has a variety of gorgeous hardware products including sliding barn door hardware, bathroom hardware and of course door hardware. Delaney products are available on HomeDepot.com as well as Build.com and Wayfair.com.

I am thrilled to partner with Delaney Hardware on their 12 Doors of December! Starting on Dec 13, each day they will reveal a new door. They are all gorgeous and worth checking out.

Getting ready for holiday visitors by refreshing the front door and installing a cool touch pad keyless entry lock. See 12 gorgeous door updates with the 12 doors of December @DelaneyHardware #DelaneyHardware #12DoorsofDecember

Winterizing Sprinklers – How to blow out sprinklers

Winterizing Sprinklers and Ridgid Compressor tool review is sponsored by The Home Depot. I have been compensated for my time and provided with product. All ideas and opinions are my own. This post contains some affiliate links for your convenience. Click here to read my full disclosure policy. 

If you have sprinklers in your yard for your lawn and live where it freezes, then one job that needs to be done each year before winter is winterizing sprinklers. If the water is left in the sprinkler lines, you could risk the water freezing and cracking your pipes in the lawn. No bueno. Winterizing your sprinklers, or blowing them out, is a simple task but you’ll need a few tools.

Tools Needed

Compressor

We have used a variety of compressor sizes to winterize our sprinklers over the years. You need a compressor that has either enough volume or large enough motor to fill your system with pressurized air. A compressor size of 4-6 gallons should be enough.  I’ve been reviewing this Ridgid 4.5 gallon quiet compressor, and it did the job in a breeze. Even though the tank size is only 4.5 gallons, the motor is strong and it fills the tank very quickly compared to other home/job site compressors I’ve used. It is also quite a bit quieter than any other compressor I’ve used, it doesn’t scare the kids when kicking on :-).  It is a bit on the heavier side though, for a portable compressor.  Overall great option.

Hose Adapter

We originally bought this water spigot adapter at the sprinkler store, or you can get one with a quick disconnect here, or make your own.

Our adapter uses our tire air chuck attachment, so we have to hold the hose onto the adapter while filling the lines with air. A quick disconnect would be so much easier.

How to Winterize Sprinklers

Continue reading

Moving a Door in the Basement

Moving a door, Dewalt cordless framing nailer and Dremel oscillating tool accessories tool review is sponsored by The Home Depot. I have been compensated for my time and provided with product. All ideas and opinions are my own. This post contains some affiliate links for your convenience. Click here to read my full disclosure policy. 

When we first moved into our house, the entrance to the basement looked so nice and finished. The basement door wasn’t a straight shot down the hall, but required a 90 degree turn after the stairs. We took a couch down into the basement. This had us reenacting a certain Friends episode… “pivot, Pivot… PIVOT”. No matter how many times we pivoted the couch we either ran into the ceiling, door frame, back wall or stairs. Ok well that stinks. Later we tried to take a queen box springs down there, same problem, we couldn’t make the turn with large items. So I did the logical thing and cut the adjacent wall out. 🙂 Problem solved, sort of.

Fast forward 8 years-ish and we still have the large hole at the entrance of the basement. I’ve been meaning to move the door for the basement into the nice big hole I cut… but… time and probably motivation.

Found some motivation, I want to build a basement playhouse for the girls this Christmas. The playhouse will be on the other side of where the door is currently. The plan is to move the basement door to the opening that I cut in the wall. I want to use the same door and molding and just rotate it 90 degrees.

I would like to have the molding/casing around the door, like it is now, but the hallway width is 3″ shy of the current door and molding width. So what I’ve decided to do is make a pop out, like the current door does now and that should give me the perfect doorway width and keep the molding.

During this remodel project, I’ll be reviewing the Dewalt cordless framing nailer and Dremel oscillating tool accessories and I’ll let you know my thoughts on these tools.

Continue reading